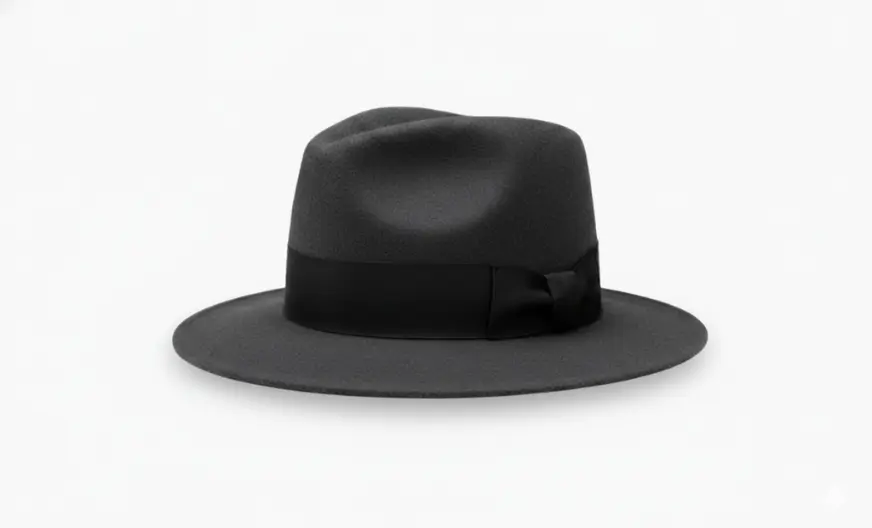
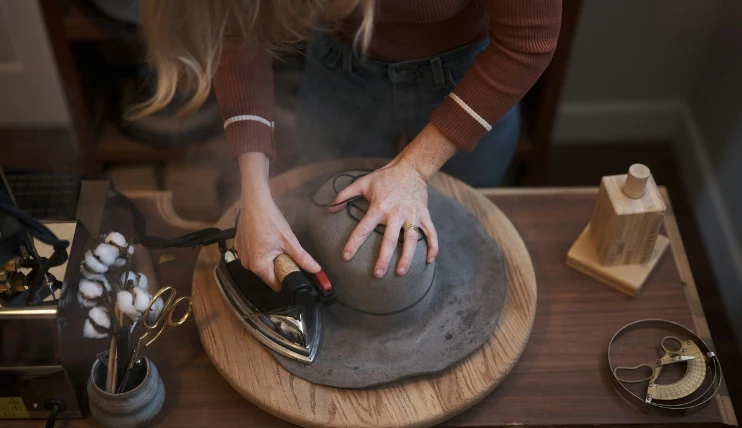
To shape a cowboy hat, hold the crown or brim a few inches above the steam from a kettle, pot, or clothes steamer until it feels soft but not wet.
Then press it into shape with your hands and hold it there for a few seconds while it cools. Most cowboy hats are felt, and felt shapes easily this way.
Fur felt shapes better than wool felt. Straw is more delicate; too much heat can crack it, so it needs a gentler touch.
Know Your Cowboy Hat Before You Start Shaping
Before you shape your cowboy hat, check what it’s made of first. Felt and straw both take steam, but straw needs a gentler touch. Leather is different altogether, it doesn’t take steam at all.
Wool Felt vs. Fur Felt: How to Tell the Difference
Check the label first. Look for words such as wool felt, fur felt, beaver, or rabbit. The manufacturer’s label or product details are the most reliable way to identify the material.
Feel the felt. Fur felt often feels smoother and softer, almost velvety, while wool felt feels coarser and stiffer. This is only a general clue because the finish and quality of the felt can affect how it feels.
Use price as another clue. Fur felt usually costs more than wool felt, but brand, quality, and design also affect the price. Price alone cannot confirm the material.
Straw Needs Gentle Care
Straw takes steam the same way felt does, but it’s more delicate. Too much heat can crack the coating, so go easy and keep an eye on it as you steam.
Leather Hats Behave Differently
Don’t use steam on a leather hat. Too much heat or water can damage the leather and make it crack or lose its shape.
Leather naturally molds to your head as you wear it, the leather warms and stretches slightly, and most hats conform within the first few weeks of regular wear.
If you need to change the shape sooner, lightly mist the area, don’t pour water directly on it, and work the leather gently with your hands. Don’t soak the hat. Let it dry on its own, away from heaters and direct sunlight.
Open Crown vs. Pre-Shaped: Check This First
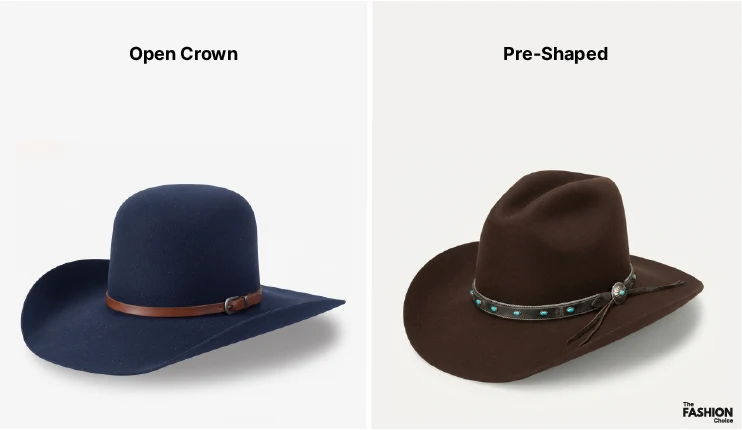
An open crown hat has no crease in the crown yet. The top looks smooth and round, with no dents or folds. You’re starting from a blank canvas, the steps ahead cover the basic technique, and you can use it to press in whichever crease you want.
A pre-shaped hat already has a crease, you’ll see a dent or fold in the crown right out of the box. If you like the shape, you likely only need small touch-ups, not a full reshape. If you want to change it, you can still steam it and press in a new crease using the same technique.
Tools You Need to Shape a Cowboy Hat
You just need a couple of things:
- A steam source: a dedicated hat steamer works best, but a kettle, pot of boiling water, or handheld clothes steamer all work fine too.
- A soft-bristle hat brush, for clearing dust before you start and cleaning up any marks afterward
- A light pair of gloves, especially for your first time, to keep the steam off your hands
- A hat stand or something round to hold the hat while it cools and dries
How to Shape a Cowboy Hat by Hand (Step-by-Step)
Got your tools ready? Let’s shape your hat.
This hatter walks through the whole process from start to finish: crown, brim, and how to fix a hat that’s already been shaped before:
Step 1: Prepare Your Cowboy Hat and Workspace
Before you start, decide what you want to change: the crown, the brim, or both. If you’re doing both, shape the crown first. The brim will sit better once the crown is right.
Brush off any dust with a soft hat brush. Do not steam a dirty hat, since the dirt can get pressed into the felt.
Set the hat on a clean table where you can turn it easily. Keep your steam source nearby.
If you are using a kettle or pot, place it on a steady surface. Keep your hands and face away from the steam, and do not let the hat touch the boiling water or the spout. If this is your first time, a light pair of gloves helps keep the steam off your hands.
Step 2: Soften the Hat Before Shaping
For a felt cowboy hat, hold the part you want to reshape, the crown or the brim, about 6 to 8 inches above the steam and keep it moving.
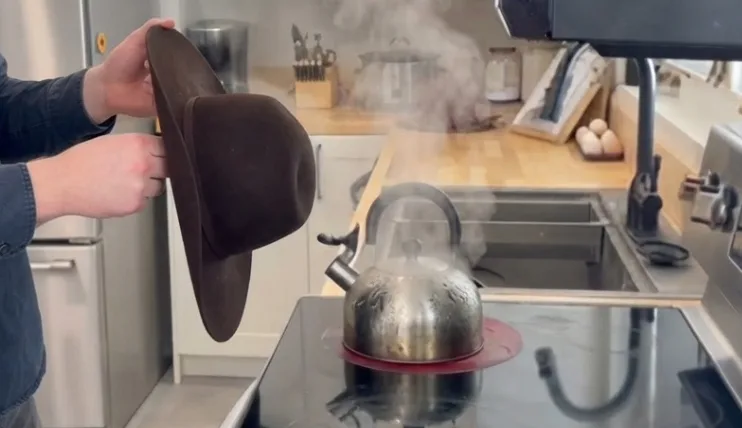
Hatters who do this often may work closer than that, sometimes just an inch or two, because they know how the felt reacts. At home, stick to the wider distance until you get used to it, it may take longer, but it gives you more room to work safely.
The felt might turn a little darker when the steam hits it. That’s normal. When it feels warm and soft, but not wet, you can shape it.
Step 3: Shape the Crown
The felt can be hot after steaming, so be careful when you touch it.
Set the crown down on a flat surface like a table, this gives you something solid to press against, and use both hands, thumbs and fingers, to shape the felt from the outside.
Start at the center and press a crease down the middle of the crown, working from front to back. Go easy right at the center, don’t press hard there. Save the pressure for as you pull your thumbs outward toward the sides.
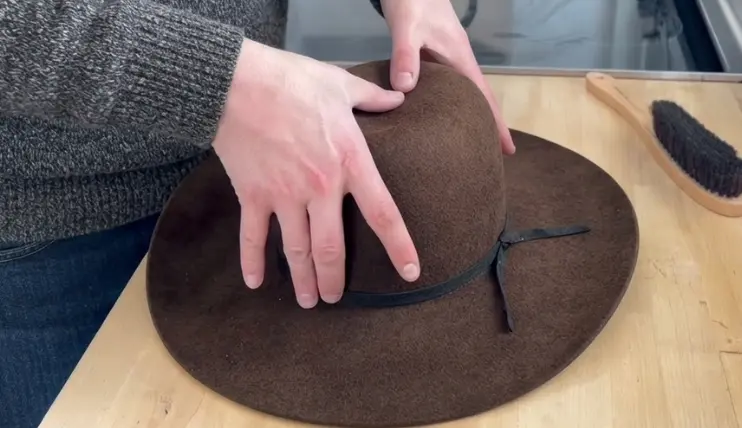
According to Cowboy Cartel, start with a little pressure in the center, then add more pressure as you move your thumbs outward. If you push too hard in the middle, the felt can puff out instead of making a clean crease, and the crease can end up wider than you want.
Start with a shallow crease. You can always go back and make it deeper. Don’t try to get the shape perfect the first time. First, get the hat roughly into the shape you want. Then look at it and fix any small things that don’t look right.
If the felt is hard to move, give it a little more steam. Don’t force it while it’s cold.
Turn the hat as you work. Check the front, back, and both sides. If one side looks different, fix it while the felt is still warm.
If the hat already had a shape, you may still see the old crease. Keep an eye on it as you work so it doesn’t pull the new shape out of place.
When the crown looks right, stop and move on.
Step 4: Shape the Brim
Now work on the brim. If it has cooled down, give it a little more steam before you start shaping it.
Curving the Brim by Hand
Steam the left and right sides of the brim well, both the top and the underside.
Once it’s warm, find your corners, put your thumbs at the base of the crown, spaced evenly on both sides, then let your fingers rest naturally out toward the brim edge, that’s your corners.
Take your fingers and pull up on both corners at the same time and hold. Working both sides together like this makes it easier to keep them even.
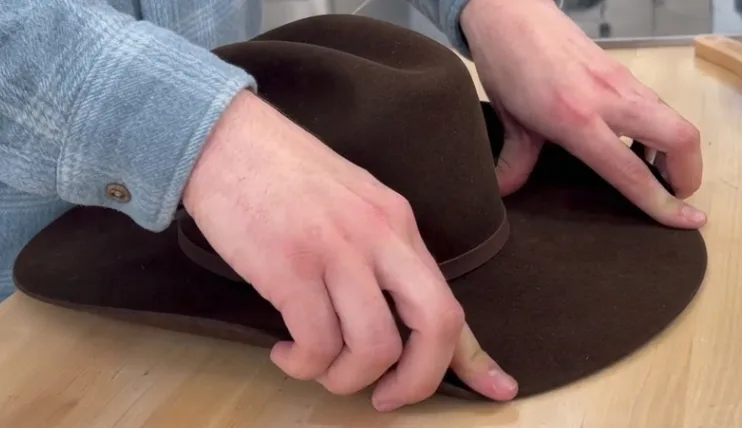
Hold each side until you can feel the heat leave the felt, then check both sides together and compare.
Step 5: Check the Shape From Every Angle
Turn the hat in your hands and look at it from the front, back, and sides.
Look at the crown first. Check that the centre crease runs straight from front to back. If you made any pinches or dents, make sure both sides look even.
Then check the brim. Hold the hat straight in front of you and compare the left and right sides. Make sure they curve the same way and sit at about the same height.
If one side looks different, make a small change to that side. Then check it again from the front and sides.
If the hat looks good from every angle, put it on and check the fit.
Step 6: Check the Fit on Your Head
Now put the hat on and see how it feels.
It should feel snug, but not tight. Move your head around a little. If the hat stays in place, that’s a good sign.
Pay attention to any spot that feels tight or uncomfortable. Take the hat off, give that spot a quick round of steam, and make a small adjustment. Then put the hat back on and check it again.
If it feels good and stays in place, all that’s left is letting it cool and set.
Step 7: Set and Cool the New Shape
If the hat looks right and feels good on your head, put it on a hat stand or set it on a clean surface.
Leave it there until it’s completely cool, usually 20 to 30 minutes at room temperature. Don’t touch or bend it while it’s warm.
Once it’s cool, the hat will keep the shape you gave it.
How to Shape a Cowboy Hat Without Steam
Don’t have a steamer? That’s okay.
You can still make small changes to your cowboy hat with a little warm water and your hands. This won’t work as well as steam for bigger changes, but it’s enough to fix a small dent or bend the brim a little.
Felt is easier to shape this way than straw. Straw is more likely to crack or lose its shape if you bend or wet it without steam, so stick to small, gentle adjustments if you’re working on a straw hat.
Shaping a Felt Cowboy Hat Without Steam
If it’s just a small dent, you can fix it with a little warm water and your hands. Use water that’s warm to the touch, not hot.
Lightly mist the area to dampen the felt, don’t soak it, and keep water away from the sweatband inside.
Push the dent out gently from inside the crown and use your other hand on the outside to help smooth it out. For the brim, bend it slowly with both hands until it has the curve you want.
Hold the shape with your hands until it cools, or wrap a rubber band or piece of string loosely around it to hold the shape while it finishes drying, away from direct sunlight or heat. If the dent is still there, mist it again and try once more. Don’t push too hard, take your time.
How to Shape a Straw Cowboy Hat
Let’s start with the crown and then move on to the brim.
Shaping the Crown of a Straw Cowboy Hat
If the crown has a dent, a crooked crease, or one side is higher, steam that part first.
Hold the crown above the steam and turn the hat so the steam reaches the area you want to shape. Keep it moving. When the straw feels soft, start fixing it.
For a dent: Put one hand inside the crown and push the dent out. Use your other hand to press the outside back into shape.
For a crooked crease: Warm the crease again and use your fingers to move it back where you want it. Take your time and work a little at a time.
If one side is higher: Warm that side and press it down a little. Check the other side as you go so you don’t take it too far.
Turn the hat as you work. Check the front and sides after each small change.
If the straw gets stiff, steam it again. Don’t force it when it’s cold.
Shaping the Brim of a Straw Cowboy Hat
Hold the brim over the steam, about 6 to 8 inches away, and turn it so the heat hits all sides, not just one spot.
Once the straw feels soft, shape the brim with your hands, thumbs on top, fingers underneath. Use light pressure and bend the brim a little at a time.
Some straw hats have a wire inside the brim. If yours has one, the wire will bend with the brim. Work slowly and make small changes as you go.
Look at the front and both sides. If one side sits higher or bends more, fix that side.
If the straw gets hard, steam it again before you keep shaping it.
How to Shape a Leather Cowboy Hat Brim
You can shape or reshape a leather cowboy hat brim by hand. Suede is more sensitive to water than smooth leather, so go easy with moisture either way, and skip it entirely if you’re not sure what kind of leather your hat is.
Shape the Brim by Hand
Put the hat on a clean table and decide how you want the brim to look.
Hold the brim with both hands and bend it into shape. Start with the front, back, or sides, and work on one part at a time.
Once a section has the right curve, hold it in place for a few seconds. Then move to the next section. Keep checking the hat from the front and sides so both sides match.
Don’t force the leather. If it feels stiff, a little moisture can help.
Use a Little Water if the Leather Needs It
If you know your hat is smooth leather (not suede), you can use a little water to help. Fill a spray bottle with water and lightly mist the underside of the brim, don’t spray the outside surface directly. Wait a minute or two for the leather to soften slightly, then shape it gently with your hands.
Don’t soak the leather. Too much water can leave marks, warp it, or damage it.
Bend the brim slowly while it is slightly damp. Hold it in the shape you want and check the shape as you go.
Let the Hat Dry
Once the brim looks right, leave the hat in that shape until it dries.
Keep it away from direct sunlight, heaters, and hair dryers. Too much heat can dry out the leather and cause it to crack.
If the brim still needs changing after it dries, make another small adjustment instead of trying to reshape everything at once.
What Not to Do When Shaping a Cowboy Hat
Before you start, keep these things in mind so you don’t damage your hat.
Don’t Flatten Your Hat With a Regular Iron
Don’t press a regular clothes iron flat onto your hat. It can flatten the crown or brim and leave a mark you may not get out.
Some hatters use a special steam iron made for this job. They keep it moving instead of pressing down and holding it still.
Even then, it can leave a mark on the felt. That’s okay, a bristle brush fixes it once the hat dries. If you don’t have that kind of iron or haven’t used one before, a kettle, pot, or steamer does the same job and is a lot safer.
Don’t Force the Hat Into Shape
Don’t try to bend the whole hat at once. Make small changes and check the shape as you go.
If the hat feels too stiff, don’t force it. Stop and use the right method to soften that material first.
Don’t Shape a Dirty Hat
Brush off any dust and dirt before you start. If you shape a dirty hat, you can press the dirt deeper into the material.
Use a soft hat brush and clean the hat first. Then start shaping it.
Don’t Shape a Hat That Needs Professional Repair
Don’t try to fix a hat that is badly damaged or badly out of shape at home.
If the crown is crushed, the brim is badly bent, or the hat has a tear, take it to a professional hatter. They have the tools and experience to fix it without causing more damage.
Can You Fully Reshape a Cowboy Hat?
Yes, you can reshape many cowboy hats, but you cannot change every hat into any shape you want. You can often fix a small dent or a slight bend in the brim at home.
If you want to completely change the crown or brim, or your hat is badly crushed or damaged, take it to a professional hatter. A hatter can check the hat and tell you if they can reshape it.
How Many Times Can You Reshape a Cowboy Hat?
You can reshape a cowboy hat more than once. There’s no exact number of times you can do it.
A good felt hat can be reshaped several times. Straw needs more care because it can crack if you bend it too much. Leather can be a little different, so check the care instructions first.
If the hat still looks and feels good, you can reshape it again. If it starts to crack, lose its shape, or look worn, stop. That’s a good time to have a hatter check it.